Timer design and development on IoT platform
Student: Riccardo Deana
Supervisor: prof. Pier Luca Montessoro
Platform: Orange Pi One
Overview
In written exams lots of student ask frequently how much time is remaining. The purpose to this project is to develop a smart timer to display the remaining time with the possibility to manage the countdown for a lot of exams that could held in the same room and can have different durations. The timer is developed on IoT platform (Orange Pi One) and is very easy to use: the user has only to power on the device, connect it to a screen with HDMI cable, create in a USB pen a text file that contains the list of exams and their durations in an apposite format described later, connect the USB pen to the timer and push the button to start the countdown. The parts of the thesis was two:
- the development of the software for the timer, base on the toolkit GTK for the creation of the graphical user interface (C language);
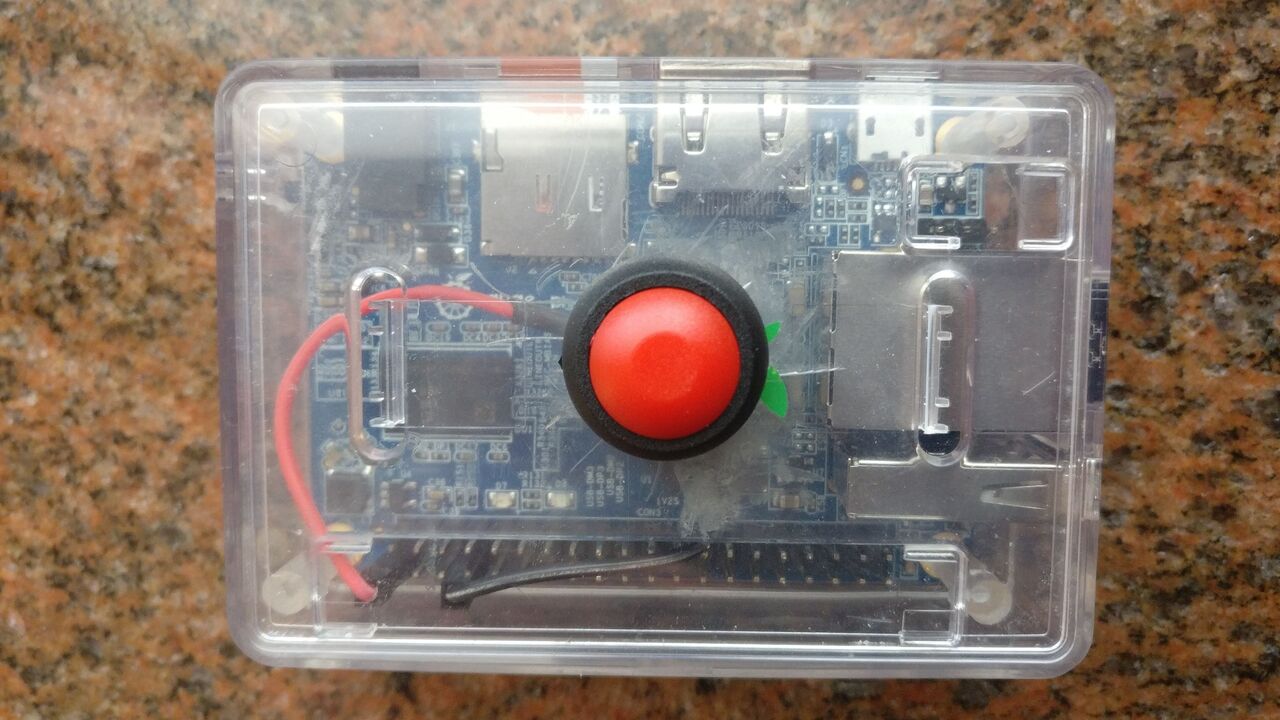
- the hacking of the Orange Pi One case for adding the button for the countdown.
What you need
- Orange Pi One (you can use also other model of Orange Pi or other boards)
- an HDMI cable
- a USB pen with the apposite file of exams and durations
- Riccardo Deana's code (Github)
Setup
For the setup of the board you have first of all to choose an OS for the board. This timer was developed on an Orange Pi One running Armbian, in particular the version 5.65. At first boot you have to configure the system and then you have to install GTK and other tools. It is possibile with the following commands:
$ sudo apt-get install libgtk-3-dev

$ sudo apt-get install unclutter
Then you have to build the timer program using gcc with the appropriate options:
$ cd <path to timer>

$ gcc `pkg-config --cflags gtk+-3.0` -o timer timer.c `pkg-config --libs gtk+-3.0`
After the building it's important to set the autorun of the timer program at boot time. In Armbian it's possible via Session and Startup voices in System Settings. If you prefer you can use also rc.local file. We suggest this solution that it's portable also for other OS. For edit rc.local file you can use an installed editor (in this case we use nano):
$ sudo nano /etc/rc.local
and add at the end of file
<path to timer>/timer &
Another important thing is verify that in Removable Drives and Media the automounting of USB devices is enabled.
Connect the button
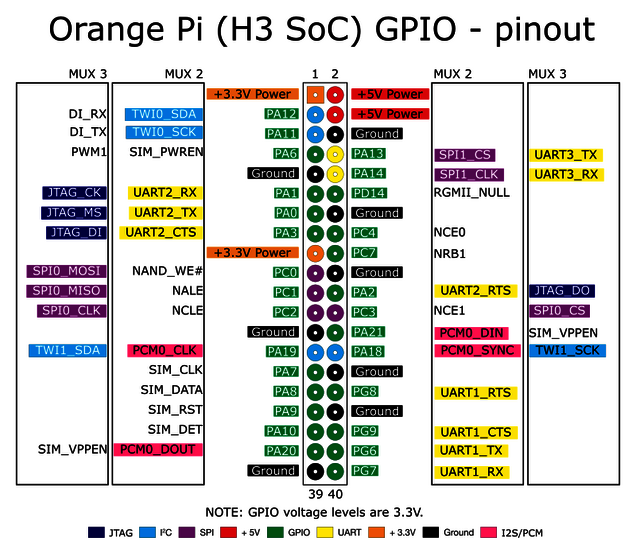
To start the countodown is used a button. The button is connect via GPIO pins 1 (3.3V) and 7 (PA6). For understand the name of GPIO pins you can see the figure below. The button is controlled using the Python library orangepi_PC_gpio_pyH3. For the setup and utilization of the library click here. With the script button.py the button press is associated to the keyboard key press of 'a'. In fact in the file timer.c the countodown starts at the pressing of any keyboard keys. Also this script has to be executed at boot so you have to add it to rc.local:
$ sudo nano /etc/rc.local
and add this line at the end:
<path to button python script>/button.py
File with the list of exams and durations
Just said before, an appropriate file is read from the USB pen for display the exams and their remaining time. The file must be saved in root directory of the USB pen and its name must be esami.txt. If you want to change it you have to edit the source code. The structure of the file is the following:
<exam name> = <duration in hours and minutes>
An example is:
Computer Networks = 2.30
Hours and minutes could be separated with "." or ":" and if the minutes aren't specified they are assumed to be zero. It's possibile to comment a line with "//".
Here you can find a detailed example of esami.txt file.