Orange Pi board setup
This tutorial explains how to setup microSD card for the usage of an Orange Pi single-board computer. You will need:
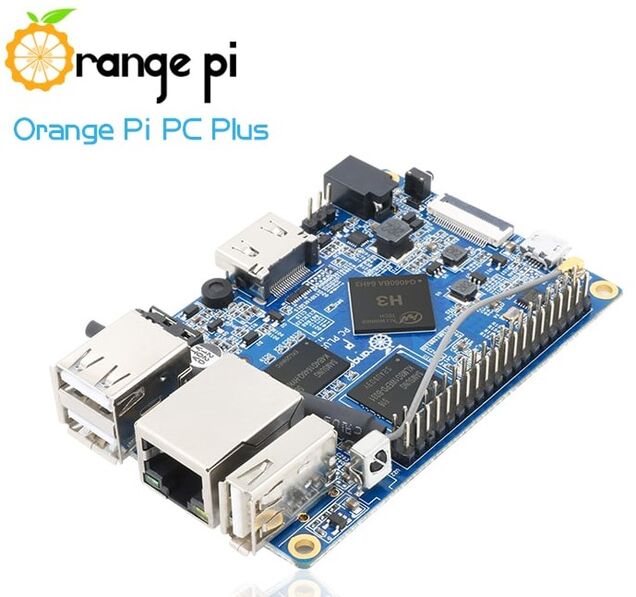
- an Orange Pi board (in this tutorial we use an Orange Pi PC Plus);
- a DC power adapater (5V, 2A);
- a microSD card (at least 8GB, class 4);
- a computer running Linux or Microsoft Windows.
In particular this tutorial shows how to configure and boot your Orange Pi board using an official Operating System image. Otherwise if you want to build a custom mainline Linux kernel system on your Orange Pi board you have to see this tutorial.

Download Operating System image
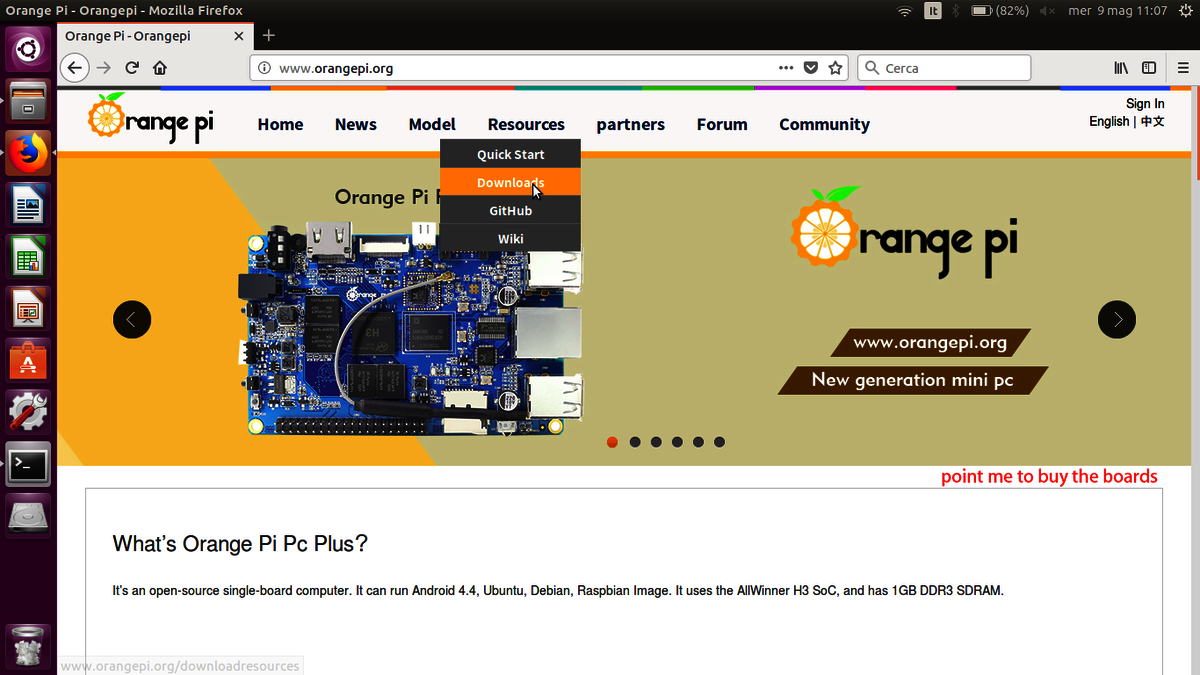
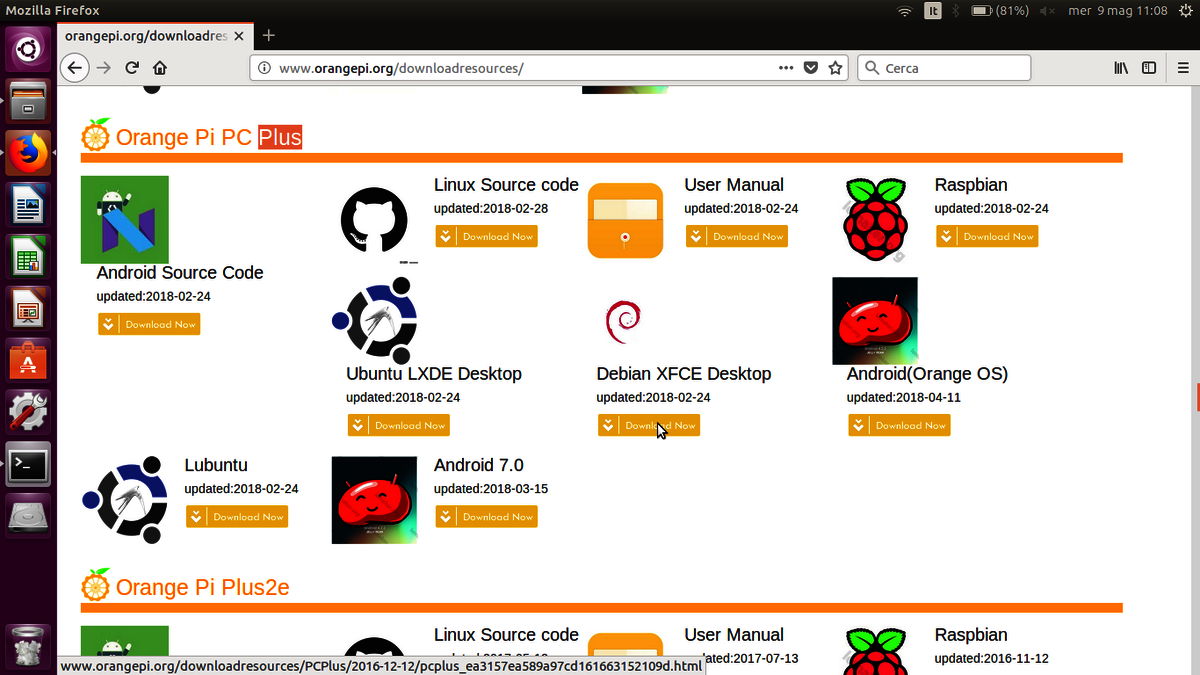
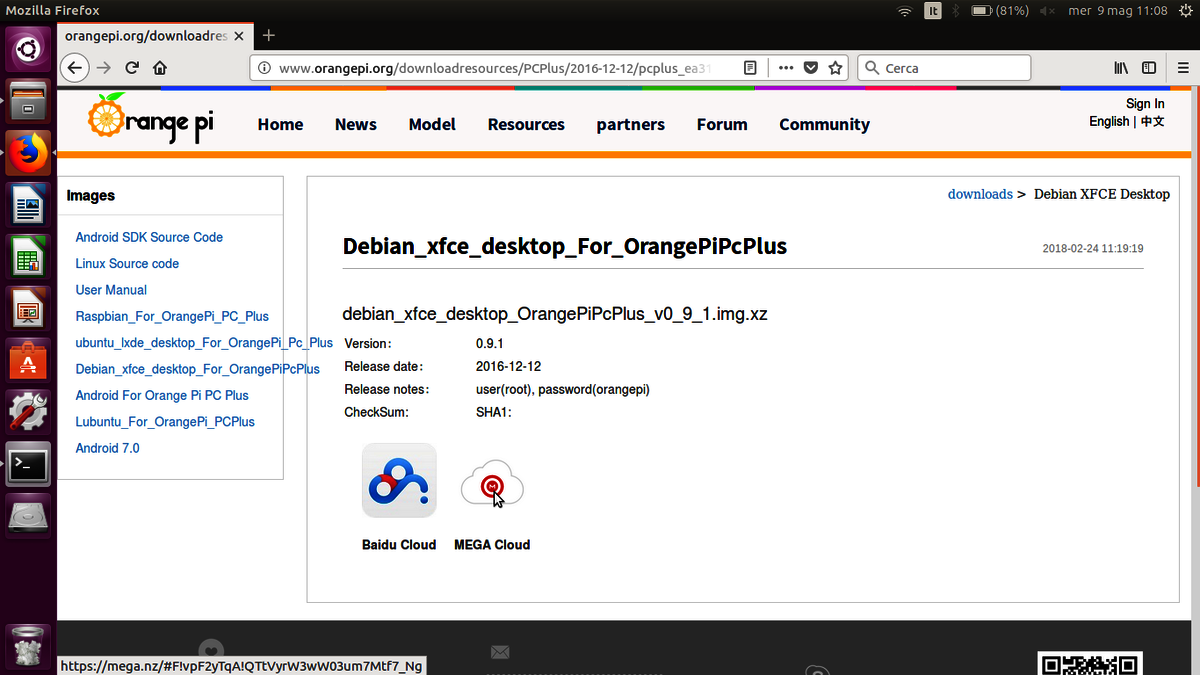
The first step is the download of an Operating System image to install into the microSD card. For this purpose connect at Orange Pi official website (http://www.orangepi.org/) and click Downloads under the label Resources. Then find your board, in this tutorial an Orange Pi PC Plus, and choose the Operating System that you want to download. For each board there are several Operating Systems. In this tutorial we try Debian XFCE Desktop. To finally download the Operating System image click over MEGA Cloud icon and click the icon to download the OS image as a ZIP. When the download is finishes, extract the OS image.
Install Operating System image into a microSD card
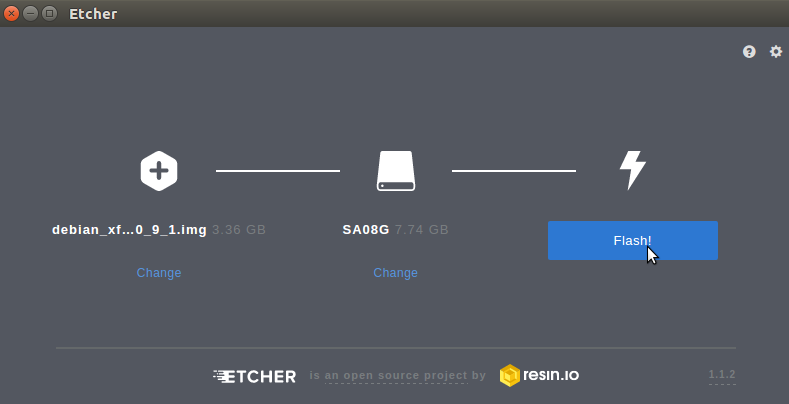
Now you need to flash the OS image just downloaded into the microSD card. To achieve this you need a program like Etcher (https://etcher.io/). It works under Linux, Microsoft Windows and macOS. Flash the OS image into your microSD card is very easy. Insert the microSD card in your computer SD slot with an adapter and launch Etcher. Now you have to choose the image that you want to flash, the device to flash and, at the end, click Flash! button. When Etcher finishes you will have a microSD ready to insert in your Orange Pi board.
Login into Orange Pi
There are some ways to use an Orange Pi single-board computer. In this tutorial we will explain how control and work with an Orange Pi board in three ways:
- using monitor, keyboard and mouse;
- using TTL serial port;
- using SSH.


Login via monitor, keyboard and mouse
One simple way to work with an Orange Pi board is use it like a desktop computer. In order to do that you will need:
- a monitor;
- an HDMI to HDMI cable or an HDMI to DVI cable (it depends from the monitor);
- a keyboard and a mouse;
- an ethernet cable (optional).
Now do the following steps:
- insert the microSD card in the slot of the Orange Pi board;
- use the HDMI cable to connect the board to the monitor;
- use an USB port to plug in the keyboard and the mouse;
- connect the board to your router via ethernet cable (optional);
- plug in the DC power connector.
At this point the boot process starts and for the first time it can take few minutes. Next boots will be quicker. At the end of the boot you can login into your Orange Pi with username and password. They depends by the Operating System that you flashed in microSD card. Tipically they are: orangepi, orangepi. Now you are ready to use the Orange Pi board.

Login using TTL serial port
Another way to use your Orange Pi board is to control it from your computer using TTL serial port. This method avoid to use monitor, keyboard and mouse. If you want to use the TTL serial port you need an USB to TTL serial cable. In particular we use the Adafruit USB to TTL serial cable (https://www.adafruit.com/product/954). Follow the vendor's indication about the possible installation of some drivers to use the cable that you buy. Now you have to connect the leads to TTL pins of the Orange Pi board through the following rules:
- the black lead to GND;
- the green lead to TX pin on Orange Pi board;
- the white lead to RX pin on Orange Pi board;
- the red lead must be unconnected.
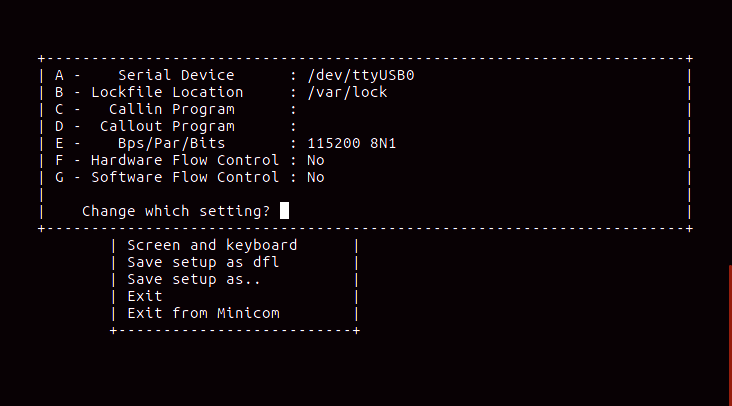
Then you can connect the cable to an USB port in your computer and you can activate a serial connection. Under Linux you can use Minicom, under Microsoft Windows PuTTY. You have to set the speed of the connection to 115200 Bps and choose the right serial device. The device under Linux is tipically /dev/ttyUSB0, under Microsoft Windows you can use the Device Manager to identify it.
Login using SSH
Finally we will see a third method to use an Orange Pi single-board computer. In this case you need an ethernet cable and, through a SSH connection, you can control the Orange Pi board by remote without monitor, keyboard and mouse. After the plug in of the ethernet cable in the RJ45 connector of the board you have to discover the IP address given to the board. A way to do it is open your router control panel. Tipically it's a web page and you can access it at the address 192.168.1.1. To enable a SSH connection under Linux you can use ssh command by terminal (ssh <username>@<ip address>). Assuming that the username is orangepi and the IP address given to the device is 192.168.1.10 the command to type is the following:
$ ssh orangepi@192.168.1.10
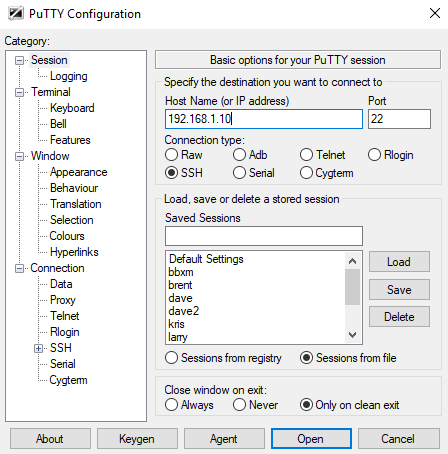
Under Microsft Windows instead you can enable a SSH connection using PuTTY. You have to configure the IP address and the port to 22. You can exit from the SSH connection typing exit command.