Control GPIO pins of Orange Pi boards
One of the most useful feature of single-board computers like Orange Pi is the possibility to configure and control an high number of GPIO (general purpose input/output) pins. For example it's possible to drive a led, read tha value of a push-button, interface with an I2C or SPI device, establish an UART connection...
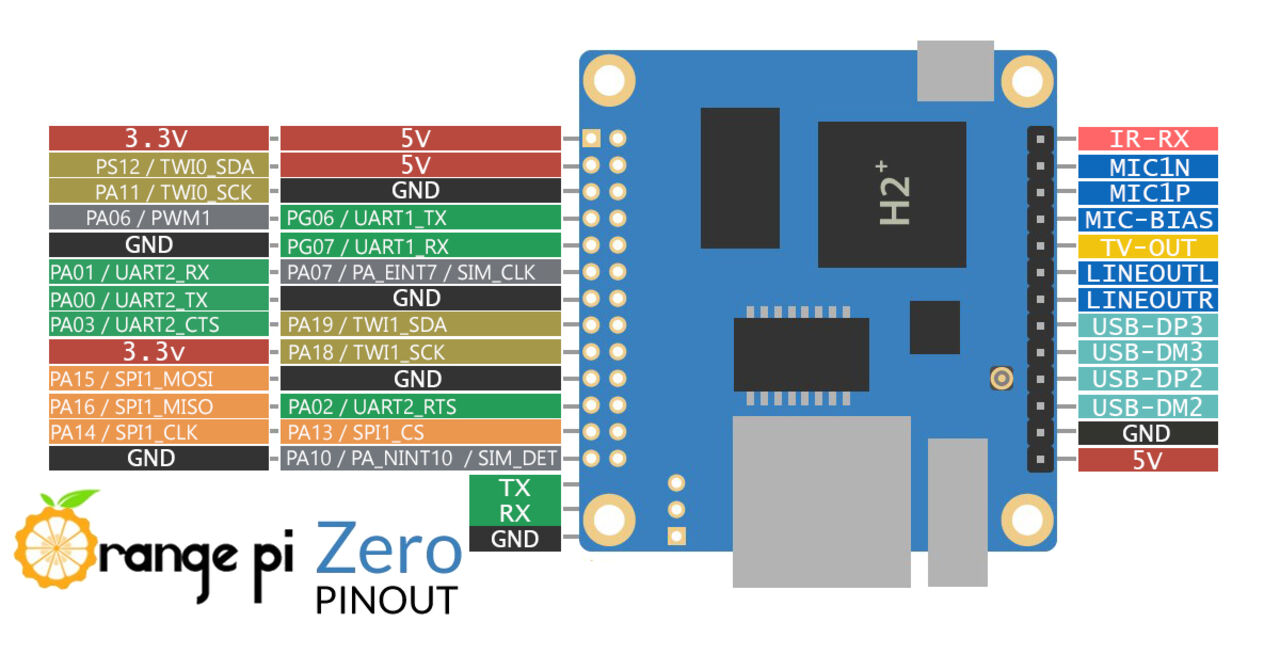
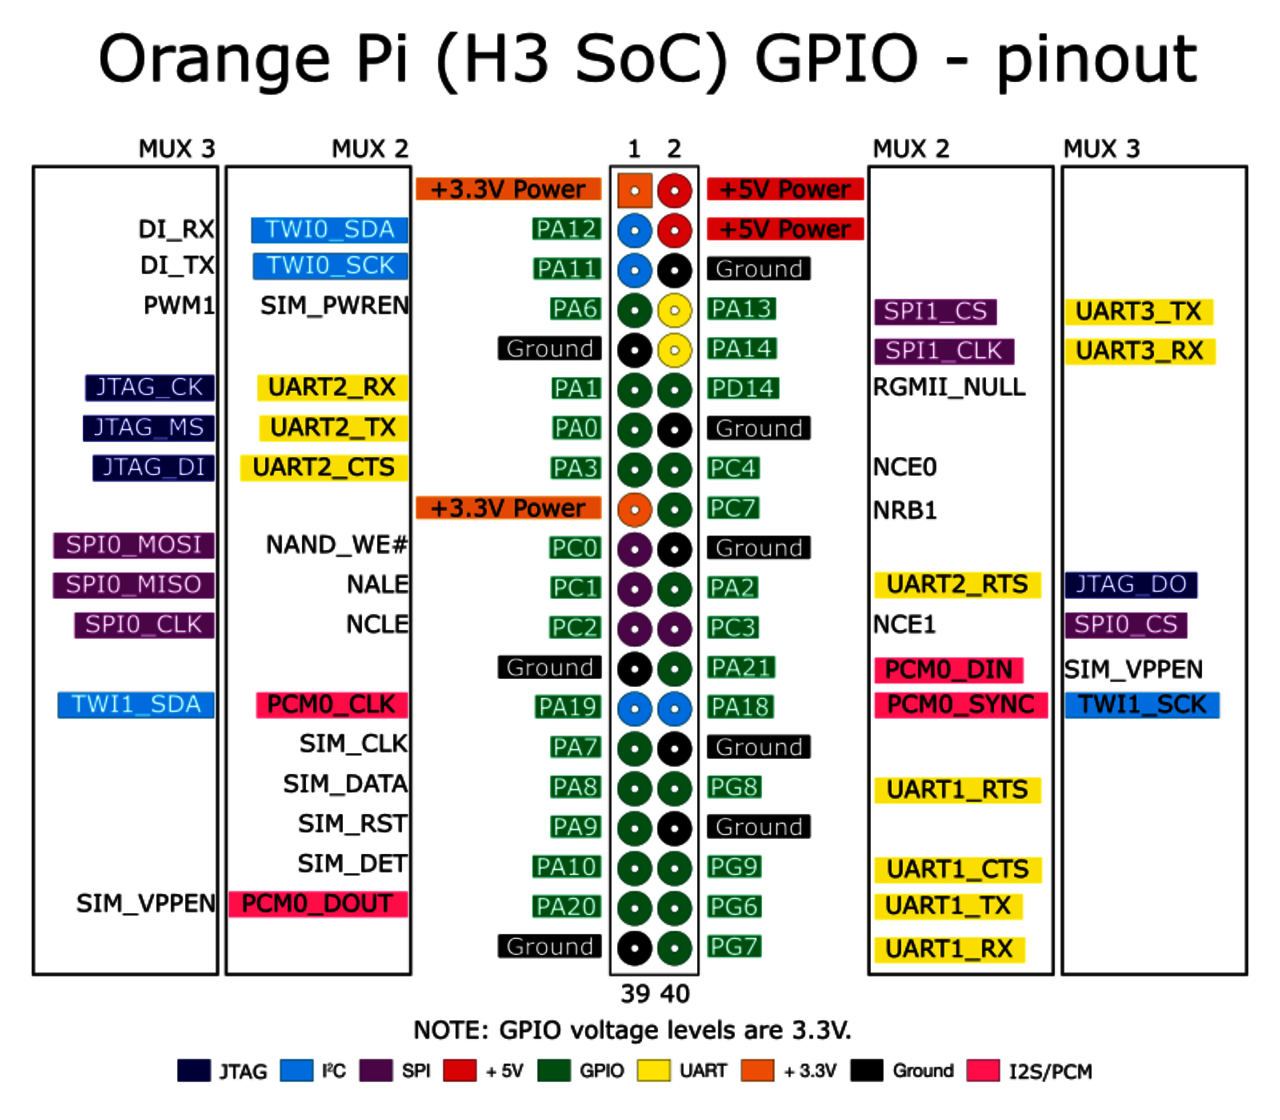
The number of GPIO pins depends by the model of Orange Pi board. The following images describe the GPIO pins for Orange Pi Zero and for boards with Allwinner H3 processor (Orange Pi One, Orange PI PC, Orange PI PC 2, Orange PI PC Plus).
There are two ways to control and configure GPIO pins:
- use an apposite library (C, C++, Python or other programming language)
- control GPIO from Linux userspace
Contol GPIO pins using a library
If you want to control the GPIO pins of an Orange Pi board using an apposite library the first step is choose the right library. So you have to decide which programming language you want to use. In the following list there are some of the most used libraries:
- WiringOP (C library)
- GPIO_pyH3 (Python library for H3 boards)
- OPi.GPIO (Python library for Orange Pi Zero)
The procedure to use a GPIO library is quite simple. You have to download the library and install it using the README file given by the authors of the library. Then you can understand how the library works watching the given examples and start to write the code for your GPIO application. Follow the respective instrunctions also for the building process.

Control GPIO pins from Linux usersapace
The second way to manage GPIO pins is using kernel userspace commands. The first step is enable this option in kernel configuration. In general, in official images, it's done by default. If you use a custom kernel you can use menuconfig tool to enable it. Go to Device Drivers, enable GPIO Support and then from GPIO Support menu enable /sys/class/gpio/... (sysfs interface).
The following image show the view in menuconfig.
Now you can control GPIO pins. Go to sysfs directory with command:
$ cd /sys/class/gpio
Use ls command to see the content of the directory:
$ ls

export gpiochip0 unexport
Files export and unexport are used to configure and deconfigure a GPIO pin. It' sufficent digit the command followed by the pin number. To calculate the number of the GPIO pin you have to use the following instrunction:
(position of letter in alphabet - 1) * 32 + pin number
For example, to use pin PA12 the command is:
$ echo 12 > export
Once the pin is exported, a directory will be creaed. In this case the directory name will be gpio12. With ls command is possibile to see the content of the folder:
$ ls gpio12

direction power subsystem uevent value
The useful fields are direction that could be in (input) or out (output) and value (0 or 1). It's possibile write and read theese fields with Linux commands echo and cat.
An example of use could be the following:
$ echo out > gpio12/direction

$ cat gpio12/direction

out

$ echo 1 > gpio12/value

$ cat gpio12/value

1
At the end you have to unexport the GPIO pin:
$ echo 12 > unexport
For other informations about controlling GPIO pins from Linux userspace you can search in Linux kernel documentation. In particular read the file Documentation/gpio/sysfs.txt of your downloaded kernel.